Mapping tables for export
The Mapping Tables for Export page allows you to create a mapping table. The goal of creating a mapping table is to create a list of accounts that will be used when exporting data. During the export, the system replaces the account codes in the Chart of Accounts by some other equivalents based on the mapping table. You can create mapping tables either manually or by importing a file.
To access the Mapping Tables for Export page, click ![]() Exports of Data > Mapping Tables for Export.
Exports of Data > Mapping Tables for Export.
Manually create a mapping table for exports
A mapping table is used to match external data fields to internal ones, so that external keys can be mapped to internal keys. Mapping tables are needed when external keys used to identify accounts are not the same as those used in Intercompany Management.
You have the options to create the mapping table manually, by doing one of the following:
Note: Whether you opt to create the mapping manually or import a file, you must first, create an identifier for the mapping table.
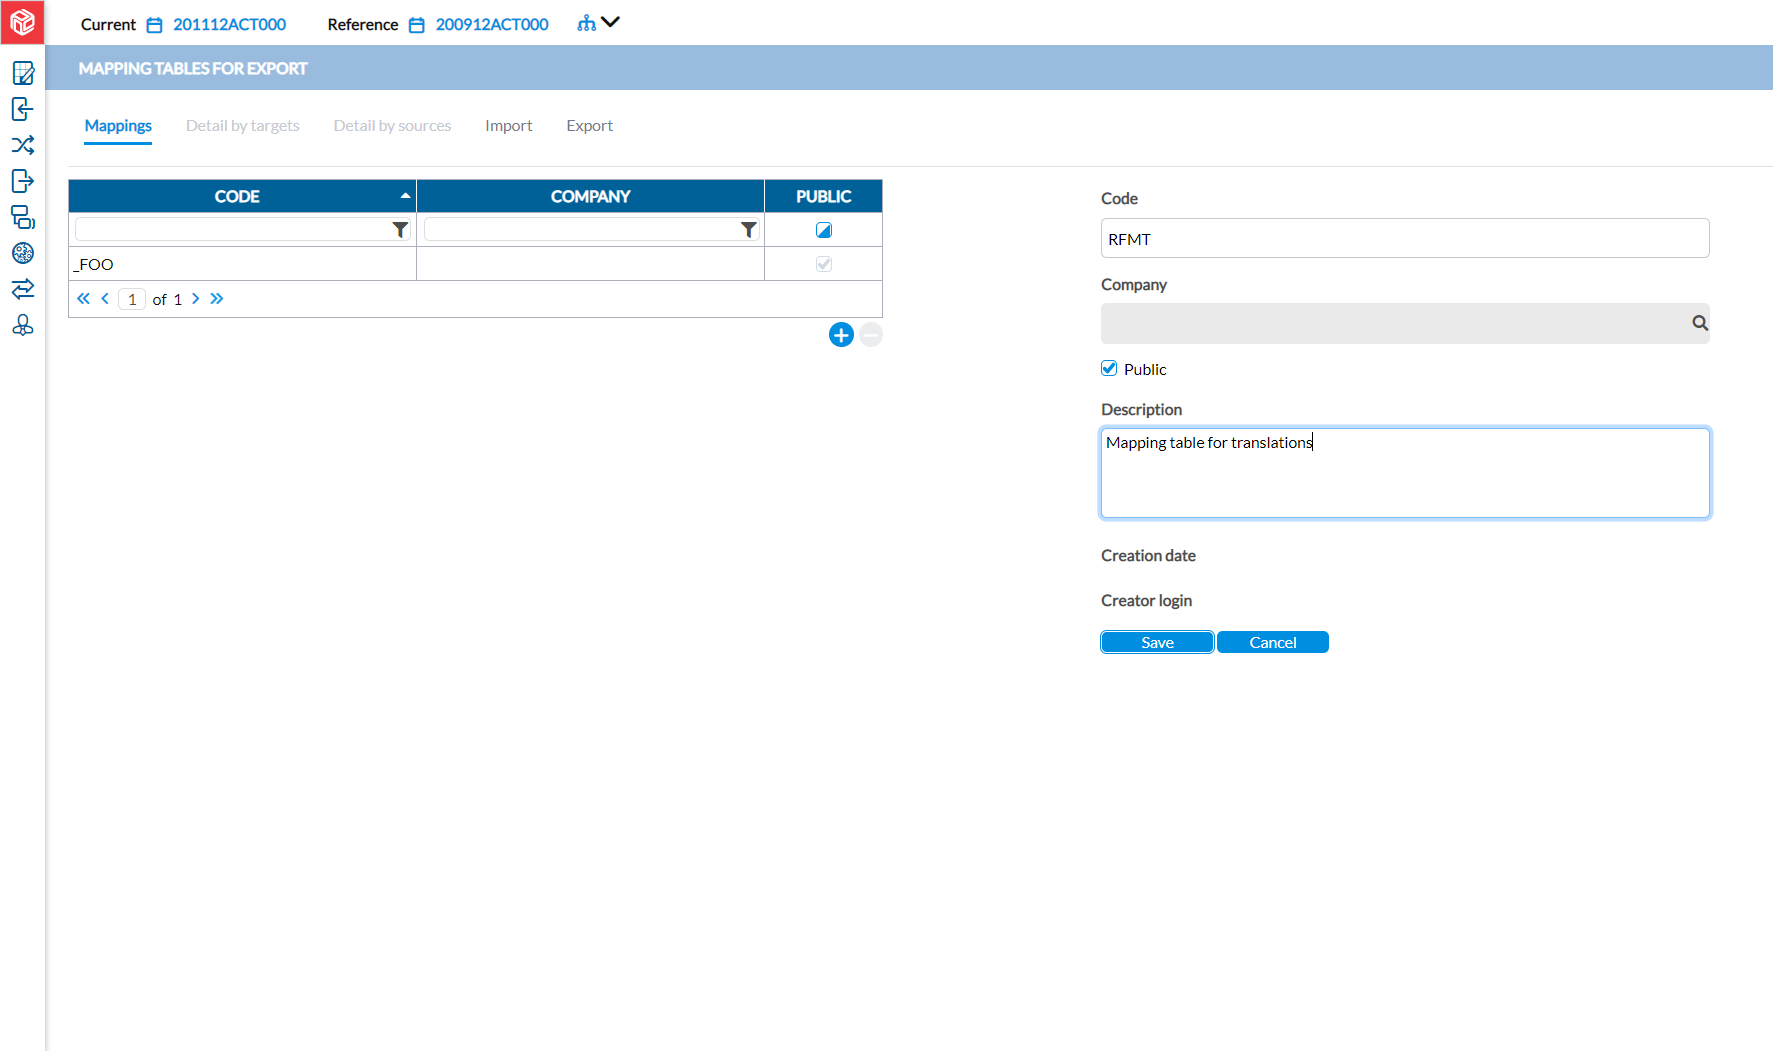
Create an identifier for the export mapping table
The process starts on the Mappings tab where you create an identifier for the mapping table. Every mapping table requires an identifier, whether you create it manually or by import.
-
On the Mapping Tables for Export page, click
 .
. -
Enter a Code for the mapping table.
-
Do one of the following:
-
To use this mapping table for a specific company only, in the Company field, enter the company code.
-
To make the mapping table available for other companies, click Public.
-
-
Enter a good Description for the mapping table.
-
Click
 . The Creation date and Creator login ID are displayed.
Add details by target
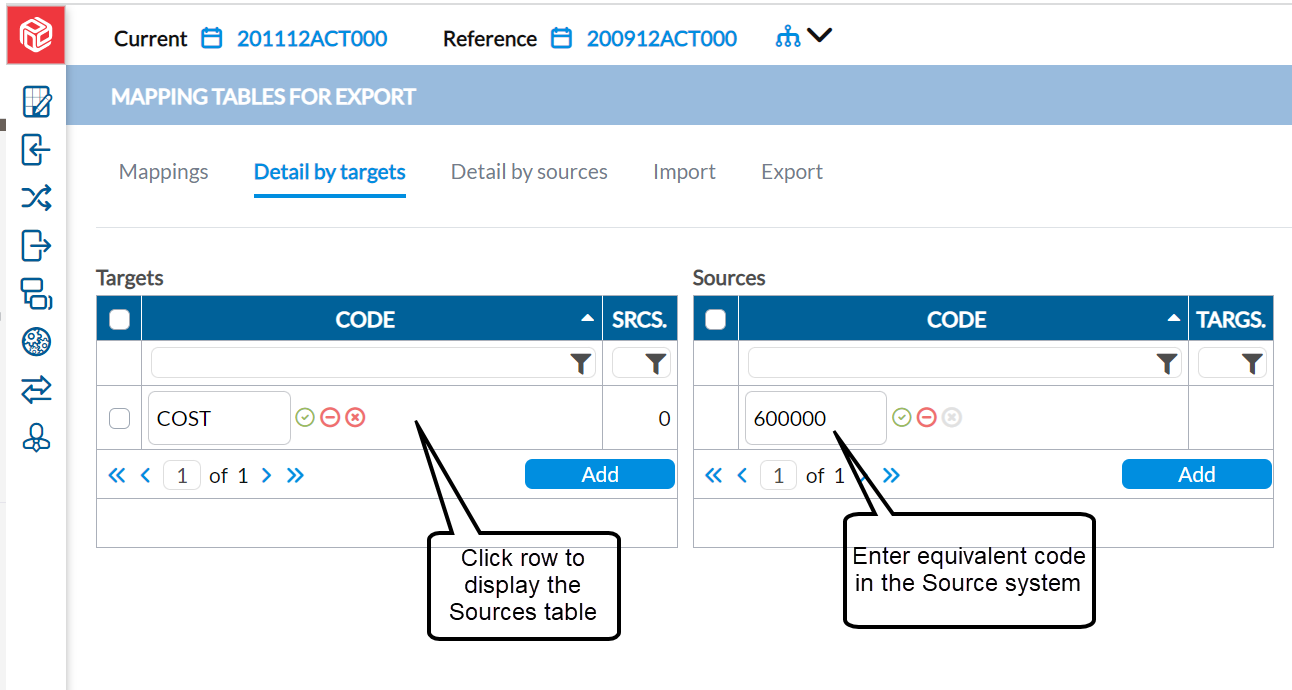
Here, you will map the account codes used Target system to the equivalent account codes in the Source system (Intercompany Management ).
-
First, complete the steps in Create a mapping table for exports.
-
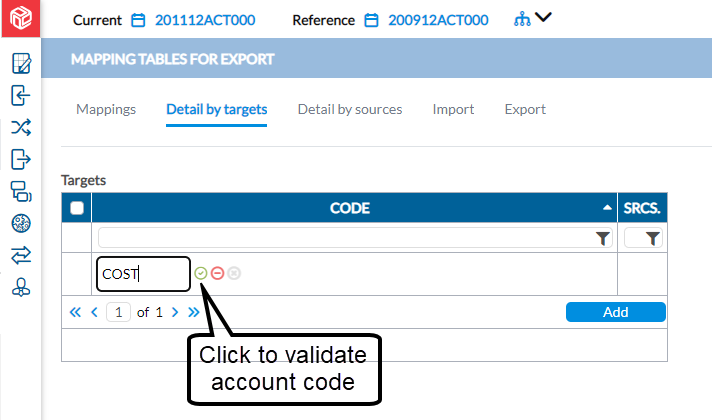
Click the Detail by target tab.
-
Click
 .
. -
Enter an account code in the field. For example, if you want to replace the “Cost” account code in the target system with the equivalent account code 600000 used in Intercompany Management, enter “Cost” here.
-
Click
 to validate the account code.
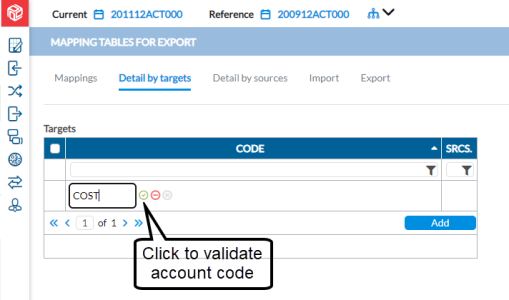
-
Click on the code you just added to display the Sources column.

-
In the Sources column, enter the name of the account in the source system equivalent to the one in the Target system. In our example, enter 600000.
-
Click
to validate the source code. -
To add additional codes, in the Targets table, click
, and repeat the same steps until you have added all the accounts you want to map. -
When you finish, proceed to the Export tab to export the mapping table to review or distribute to other users.
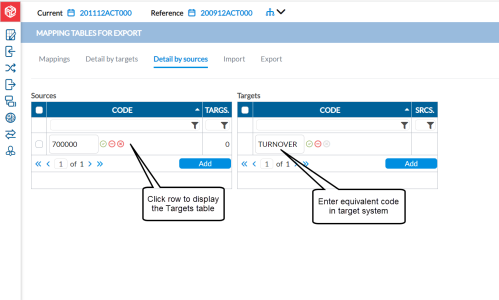
Add details by source
On this tab, you map the account codes in the Source system (Intercompany Management ) to the equivalent codes used in the Target system.
-
First, complete the steps in Create a mapping table for exports.
-
Click the Detail by sources tab.
-
Click
. -
Enter an account code in the field. For example, if you want to map account code 700000 in Intercompany Management to say, Turnover in the Target system, enter 700000 here.
-
Click
to validate the account code. 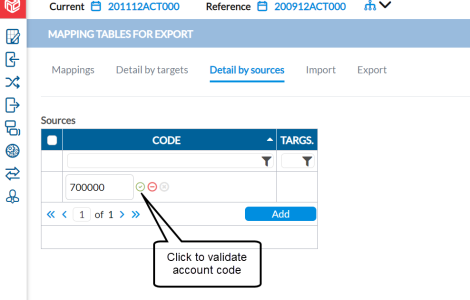
-
Click on the code you just added to display the Targets column.
-
In the Targets column, enter the name of the account in the Target equivalent to the one in the Source. In our example, enter Turnover.
-
Click
to validate the target code. -
To add additional codes, in the Sources table, click
, and repeat the same steps until you have added all the accounts you want to map. -
When you finish, proceed to the Export tab to export the mapping table to review or distribute to other users.


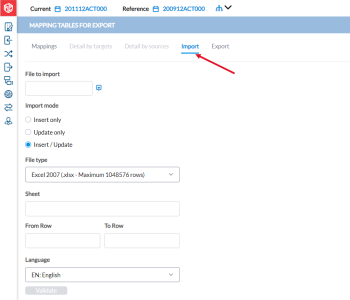
Import a mapping file
Another option available to create a mapping table is to import a file containing the list of account codes. This is a better option when you need to link a high volume of account codes. You can do this using the Import tab.
Tip: When you import, you need to follow a predefined model. If you are new to the application, we recommend that you first, do an export to obtain a model to use for your mapping in an application outside of Financial Consolidation.
-
First, complete the steps in Create a mapping table for exports.
-
Click the Import tab.
-
Click
 beside the File to Import field to display your file explorer. Navigate to, and select the file you want to upload. The name of the selected file appears in the File to import text field.
 -
Select an import mode:
-
Insert only - creates the account codes in the application during import
-
Update only - only updates account codes with the ones in the import file
-
Insert /Update - creates any new account codes and updates existing ones
-
-
In the File type field, select a file type. You can import XLS , XLSX, or CSV (Comma Separated Value) files.
Note: Depending on the selected file type, you may be required to provide additional parameters such as decimal separator, text separator.
-
In the Sheet field, enter the sheet name if more than one sheet is in the import file.
-
Optionally, select the rows of data you want to import from the file by specifying the From Row (first line) and To Row (last line).
-
In the Language field, select the language in which you want the entity to be imported.
-
Click
 to launch the validation of the data to be uploaded. Look for the result of the validation on the right side of the page.
-
If there are no errors, click
 to finalize the import procedure.
 -
If the file contains errors, generate a validation report to obtain the details. Click on any of the report formats (PDF, XLS, XLSX) available to generate the report and see the lines in error and the reason for the error.
-
-
After the import is validated, check the imported data. Either click the Data by target or Detail by source tab to view the relationship established between the imported Target and Source account codes.
-
Optionally, make edits to the account codes, if needed. Remember to click
to save any edits you made. You can also delete account codes by clicking  .
. -
Click
.
Export a mapping table
After creating your mapping table either manually or by import, you can export it to review, send to others, or save on your computer.
-
Click the Export tab.
-
In the Mapping code (in company) field, select the mapping code.
-
In the File type field, select the output file type. Options include PDF, XLS, and XLSX.
-
If you selected .XLS or . XLSX, enter a Sheet name .
-
If you selected .CSV, enter a Separator (comma, tab, semi-colon, or space), Text quote (single quote or double quote).
-
-
In the Language field, select a language.
-
Click Export to generate the file. After the file is generated, a download link appears below for you to click and view. You may also save the file.
Note: If you make changes to the exported file, you can import the modified file into the application using the Import tab.