Create job schedules
On the Schedules page, the administrator can program several functions to run at specific times. These functions include:
To access the Schedules page, click ![]() Administration > Schedules.
Administration > Schedules.
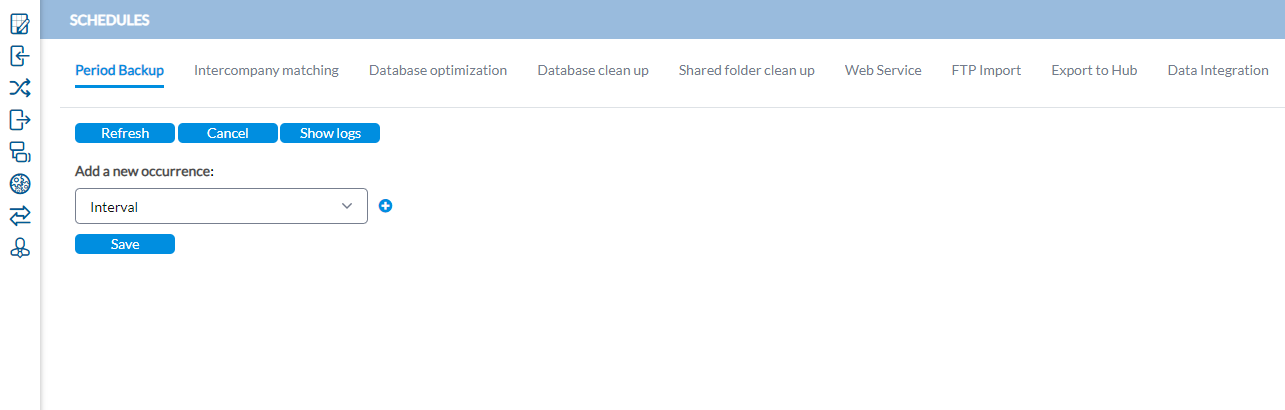
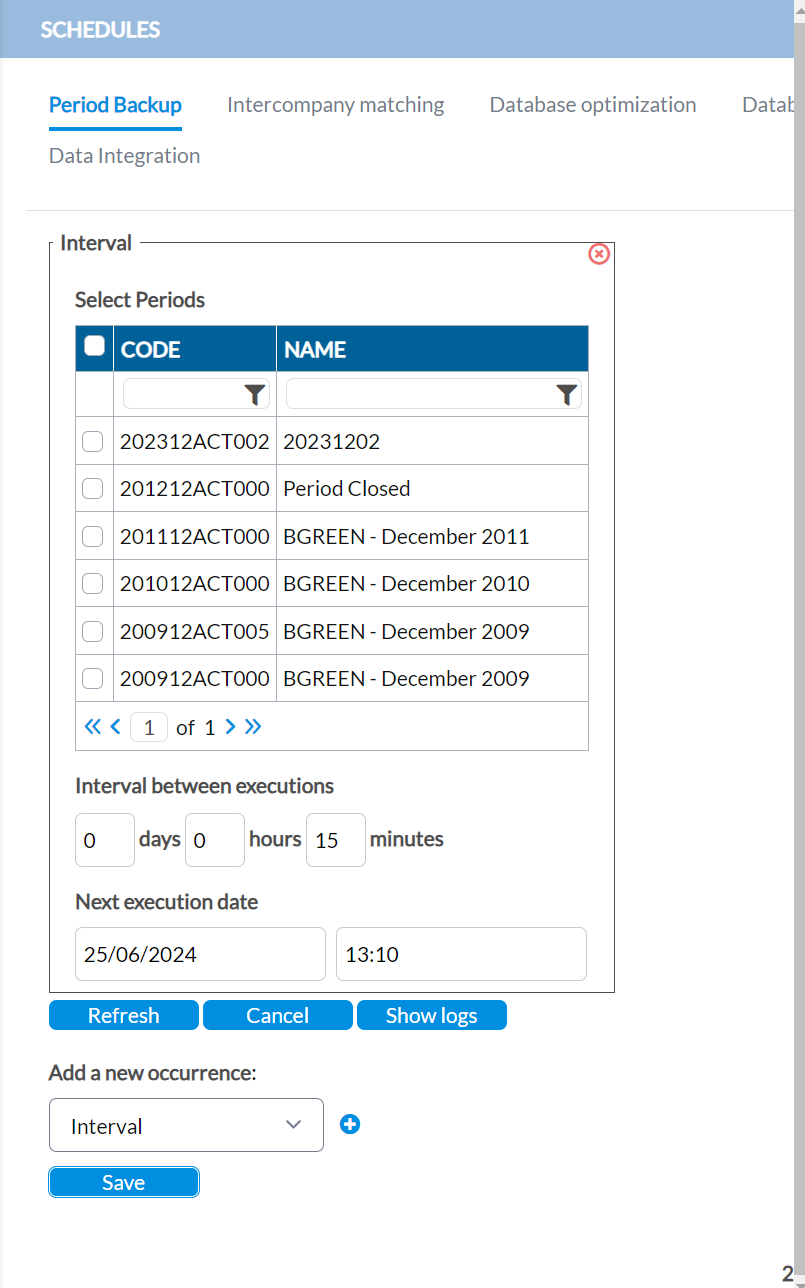
Period backup
With the Period Backup job, administrators can:
-
automate the manual process of taking regular backups of their periods before modification or deletion.
-
schedule backups to run at regular intervals, during non-business hours, etc.
-
On the Period Backup tab, select the type of schedule you want to add from the Add a new occurrence drop-down list.
-
Click
 .
. -
To run the job immediately, select Single execution.
-
To schedule the job to run later, select Interval.
Depending on your selection, a Single execution or Interval panel is displayed.
Single execution
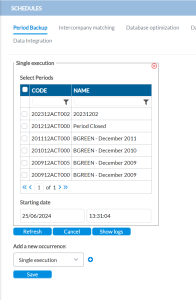
For Single execution, complete these fields:
-
Select the period (s)- consolidation period(s) you want to schedule for backup.
-
Starting date - start date and time of the execution
Interval
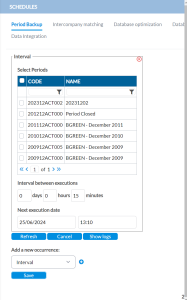
For Interval, complete these fields:
-
Select the period (s)- consolidation period(s) you want to schedule for backup.
-
Interval between executions - enter the length in between cycles in days, hours, minutes
-
Next execution date and time - enter the start date and time of the next cycle
-
-
Click
 .
. Note: To view the logs stored after the scheduler has run, click Show Logs.

Intercompany matching
Here, the administrator can schedule when automatic matching process runs.
-
On the Intercompany matching tab, select the type of schedule you want to add from the Add a new occurrence drop-down list.
-
Click
. -
To run the job immediately, select Single execution.
-
To schedule the job to run later, select Interval.
Depending on your selection, a Single execution or Interval panel is displayed.
Single execution
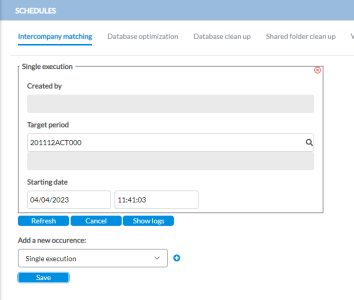
Complete these fields:
-
Target period - consolidation period to which the schedule applies.
-
Starting date - start date and time of the execution
Interval
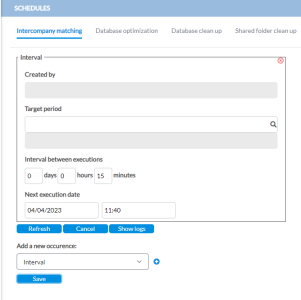
Complete these fields:
-
Target period - consolidation period to which the schedule applies.
-
Interval between executions - enter the length in between cycles in days, hours, minutes
-
Next execution date and time - enter the start date and time of the next cycle
-
-
Click
. Note: To view the logs stored after the scheduler has run, click Show Logs.
When there is an error, such as an account that is not part of any intercompany rule, it will be logged in the error log, as follows: Some accounts (111222, 222333.009978) for which data has been entered are not part of any matching rule. These data entry lines will not be taken into account.


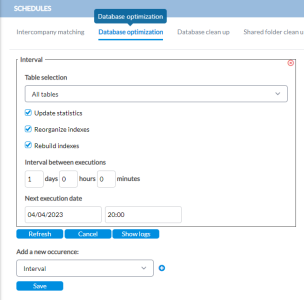
Database optimization
Database optimization is maximizing the speed and efficiency with which data is retrieved. Using the Database optimization tab, the administrator can schedule a job to run the optimization at a specific time or at regular intervals.
-
Click the Database optimization tab. The Interval panel is displayed (default).
You also have the option to schedule the job to run later at a specific time. To do this, from the Add a new occurrence drop-down list, select Single execution and click
. The Single execution panel is displayed.
-
From the Table selection drop-down list, make a selection.
-
Next, select the type of optimization you want the job to perform (reorganize indexes, update statistics, etc.).
-
Do one of the following:
-
If you selected Interval, complete the following:
- Interval between executions - enter the length of time in between cycles in days and hours
-
Next execution date in and time - specify the date and time at which the job will run next
-
If you selected Single execution, enter Starting date.
-
-
Click
. Note: To view the logs stored after the scheduler has run, click Show Logs.


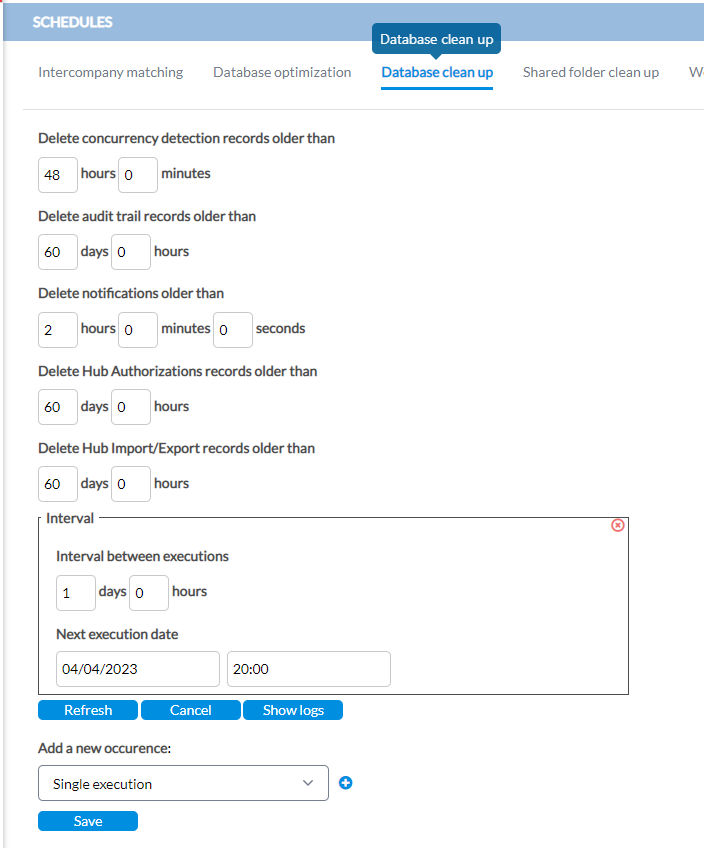
Database cleanup
Records older than a certain date or time can be deleted to clean up the database. Administrators have the ability to do this on the Database cleanup tab.
-
Click the Database cleanup tab. The following panel is displayed.
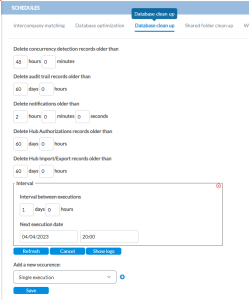
-
In each field, enter optimum in days /hours /minutes/ minutes as applicable. For example, to delete audit trail records older than 65 days, enter 65 in the days box.
-
Optionally, if you want the schedule to run at intervals, in the Interval panel, enter the length in between cycles in days and hours in the Interval between executions field and specify the Next execution date in and time. Otherwise, click
 to delete the interval occurrence.
 -
Click
. Note: To view the logs stored after the scheduler has run, click Show Logs.
Shared folder cleanup
Use the following steps to clean up the shared folder.
-
Click the Shared folder cleanup tab. The Interval panel is displayed (default).
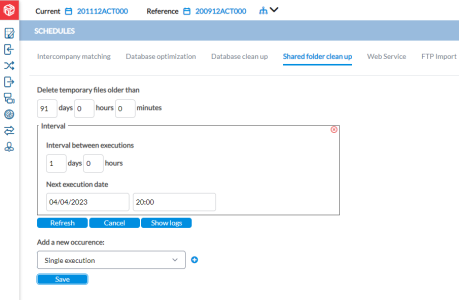
-
Enter the information required in the fields.
-
To add a new occurrence, from the Add a new occurrence drop-down list, select a type and provide the information required.
-
Click
. Note: To view the logs stored after the scheduler has run, click Show Logs.

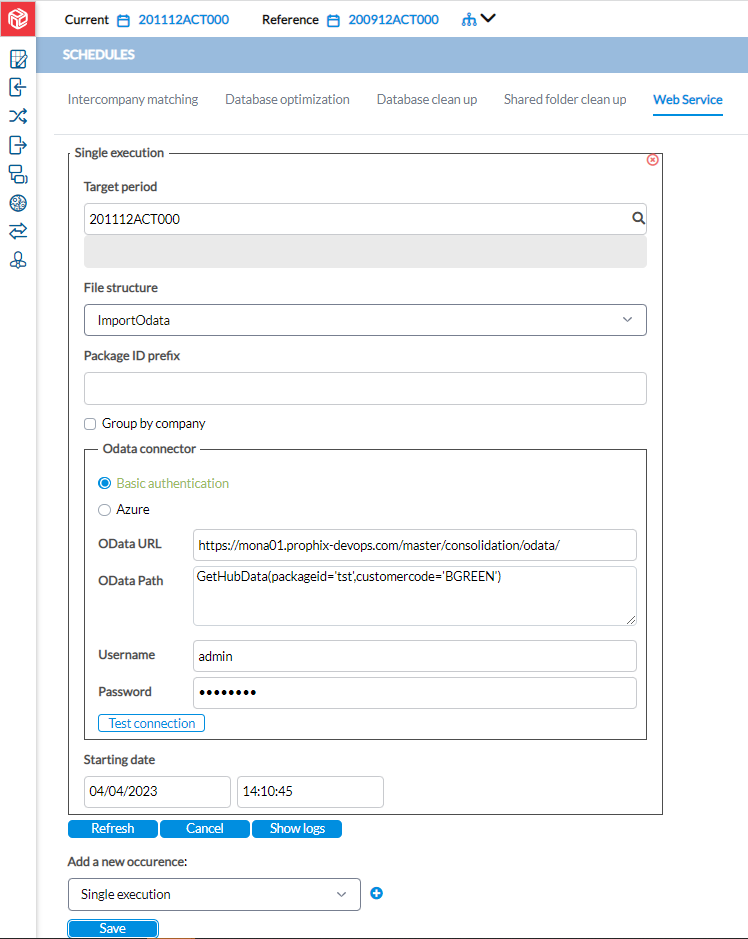
Web service
This section is used to configure the Web services required to create connections with OData over the internet.
-
Click the Web Service tab.
-
From the Add a new occurrence drop-down list, select an occurrence: Interval or Single execution.
-
Click
. The following panel is displayed:
-
Provide the information required in the Target period, File structure, and Package ID prefix fields.
-
Optionally, to group the data by company, select Group by company.
-
In the Odata connector panel, select your preferred connection method—Basic Authentication or Azure, and enter the required information.
-
To test the connection, click Test connection.
-
Do one of the following:
-
If you selected Interval, complete the following:
- Interval between executions - enter the length of time in between cycles in days and hours.
-
Next execution date in and time - specify the date and time at which the job will run next.
-
If you selected Single execution, enter Starting date.
-
-
Click
. Note: To view the logs stored after the scheduler has run, click Show Logs.
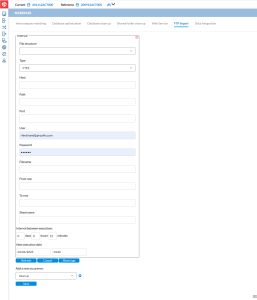
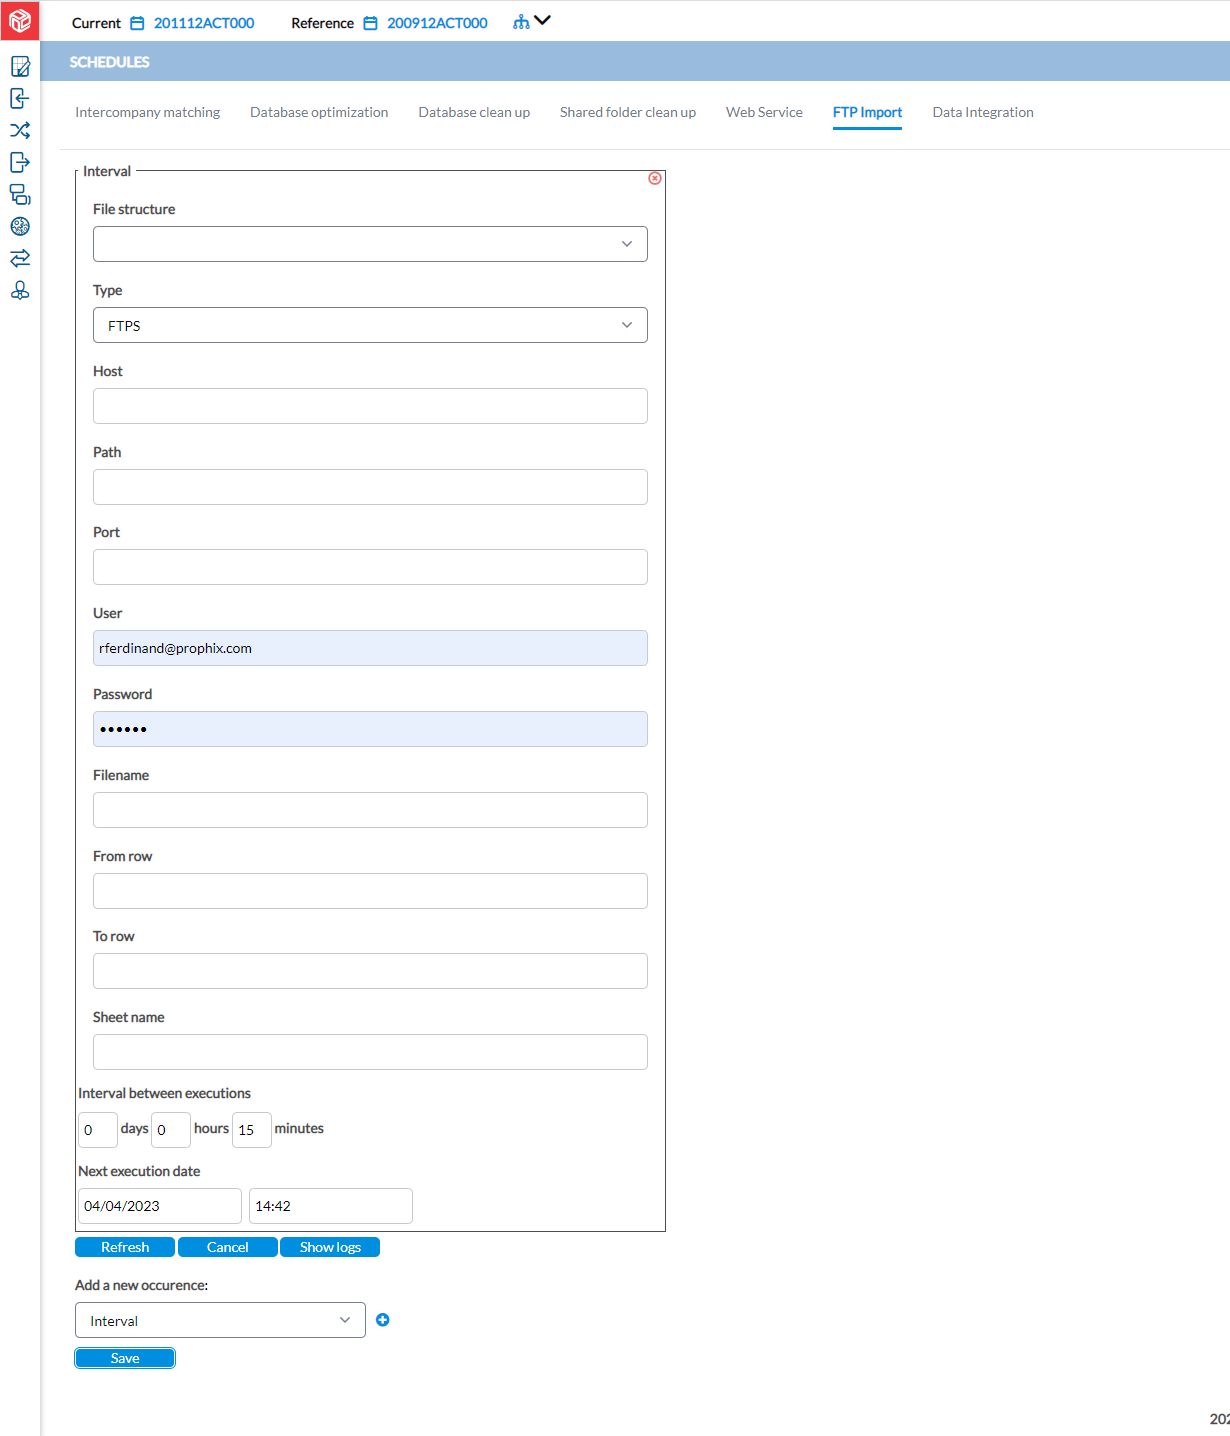
FTP import
Administrators can schedule FTP file transfers to automate data import over a network on the FTP import tab.
-
Click the FTP import tab.
-
From the Add a new occurrence drop-down list, make a selection.
-
Click
. -
To run the job immediately, select Single execution.
-
To schedule the job to run later, select Interval.
-
-
Depending on your selection, a Single execution or Interval panel is displayed.
-
Enter the information required in the following fields:
-
File structure - select the file import stucture
-
Type - select a secure file transfer protocol (FTPS, SFTP)
-
Host - the FTP server
-
Path - the URL to access the file on the server
-
Port - the port number that controls the connection
-
Filename - name of the file to imported
-
From row - specify the first line of the data to import
-
To row - specify the last line of data to import
-
Sheet name - enter a sheet name if more than one sheet is in the import file.
-
-
Do one of the following:
-
If you selected Interval, complete the following:
- Interval between executions - enter the length of time in between cycles in days and hours
-
Next execution date in and time - specify the date and time at which the job will run next
-
If you selected Single execution, enter the Starting date.
-
-
Click
. Note: To view the logs stored after the scheduler has run, click Show Logs.
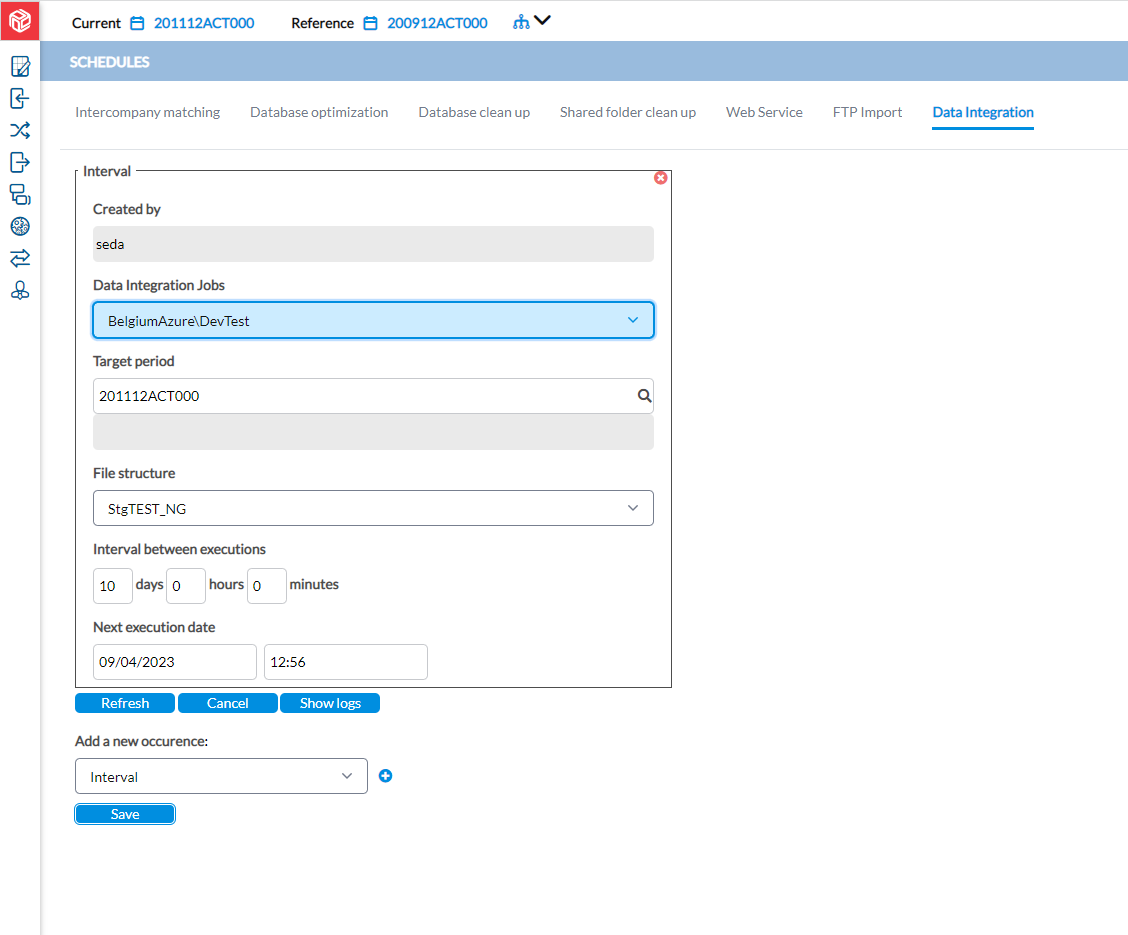
Data integration
Administrators can schedule data integration jobs on the Data integration tab.
-
On the Data integration tab, from the Add a new occurrence drop-down list, select the type of schedule you want to add.
-
Click
. -
To run the job immediately, select Single execution.
-
To schedule the job to run later, select Interval.
Depending on your selection, a Single execution or Interval panel is displayed.
Single execution
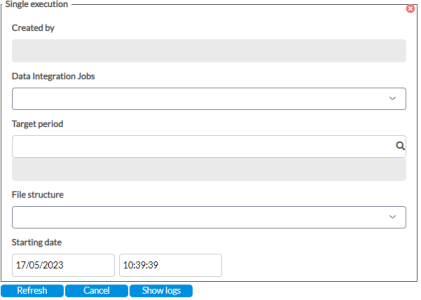
Complete these fields:
-
Data Integration Jobs - the site on which the data resides
-
Target period - the consolidation period into which the data will be integrated
-
File structure - file structure to use for data uploading the data
-
Starting date - start date and time for the job.
Interval

Complete these fields:
-
Data Integration Jobs - the site on which the data resides
-
Target period - the consolidation period into which the data will be integrated
-
File structure - file structure to use for data uploading the data
- Interval between executions - enter the length of time in between cycles in days and hours
Next execution date in and time - specify the date and time at which the job will run next
-
-
Click
. Note: To view the logs stored after the scheduler has run, click Show Logs.

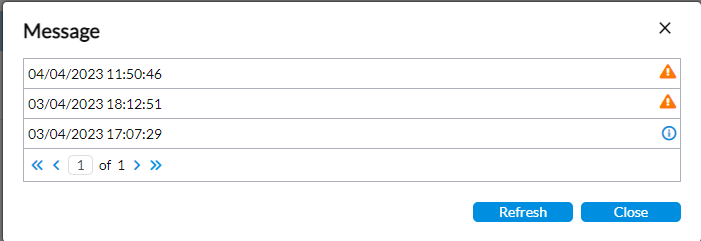
View logs
A log is stored every time a job schedule runs. Logs provide useful clues that can be used for troubleshooting. After the schedules have been executed, you can view the results in the logs.
-
Click the tab applicable to the log you want to view. For example, to view a log of the Intercompany matching schedule, click on the Intercompany matching tab.
-
Click
 . The Message panel displays:
-
 - Indicates that something unexpected happened to disturb the process but the execution did not fail; provides forewarning of potential problems
 -
 - Indicates that during the execution, an event occurred. The event is purely informative and can be ignored.
-
-
Click on an icon to display the log.
-
Click
 to exit the Message panel.