User rights and access
On the User Rights page, and administrator can assign user rights to companies and generate user rights report. User rights permissions control access to companies and their data and allow users to perform tasks in the companies to which they are assigned.
To access the User Rights page, click ![]() Administration > User Rights.
Administration > User Rights.
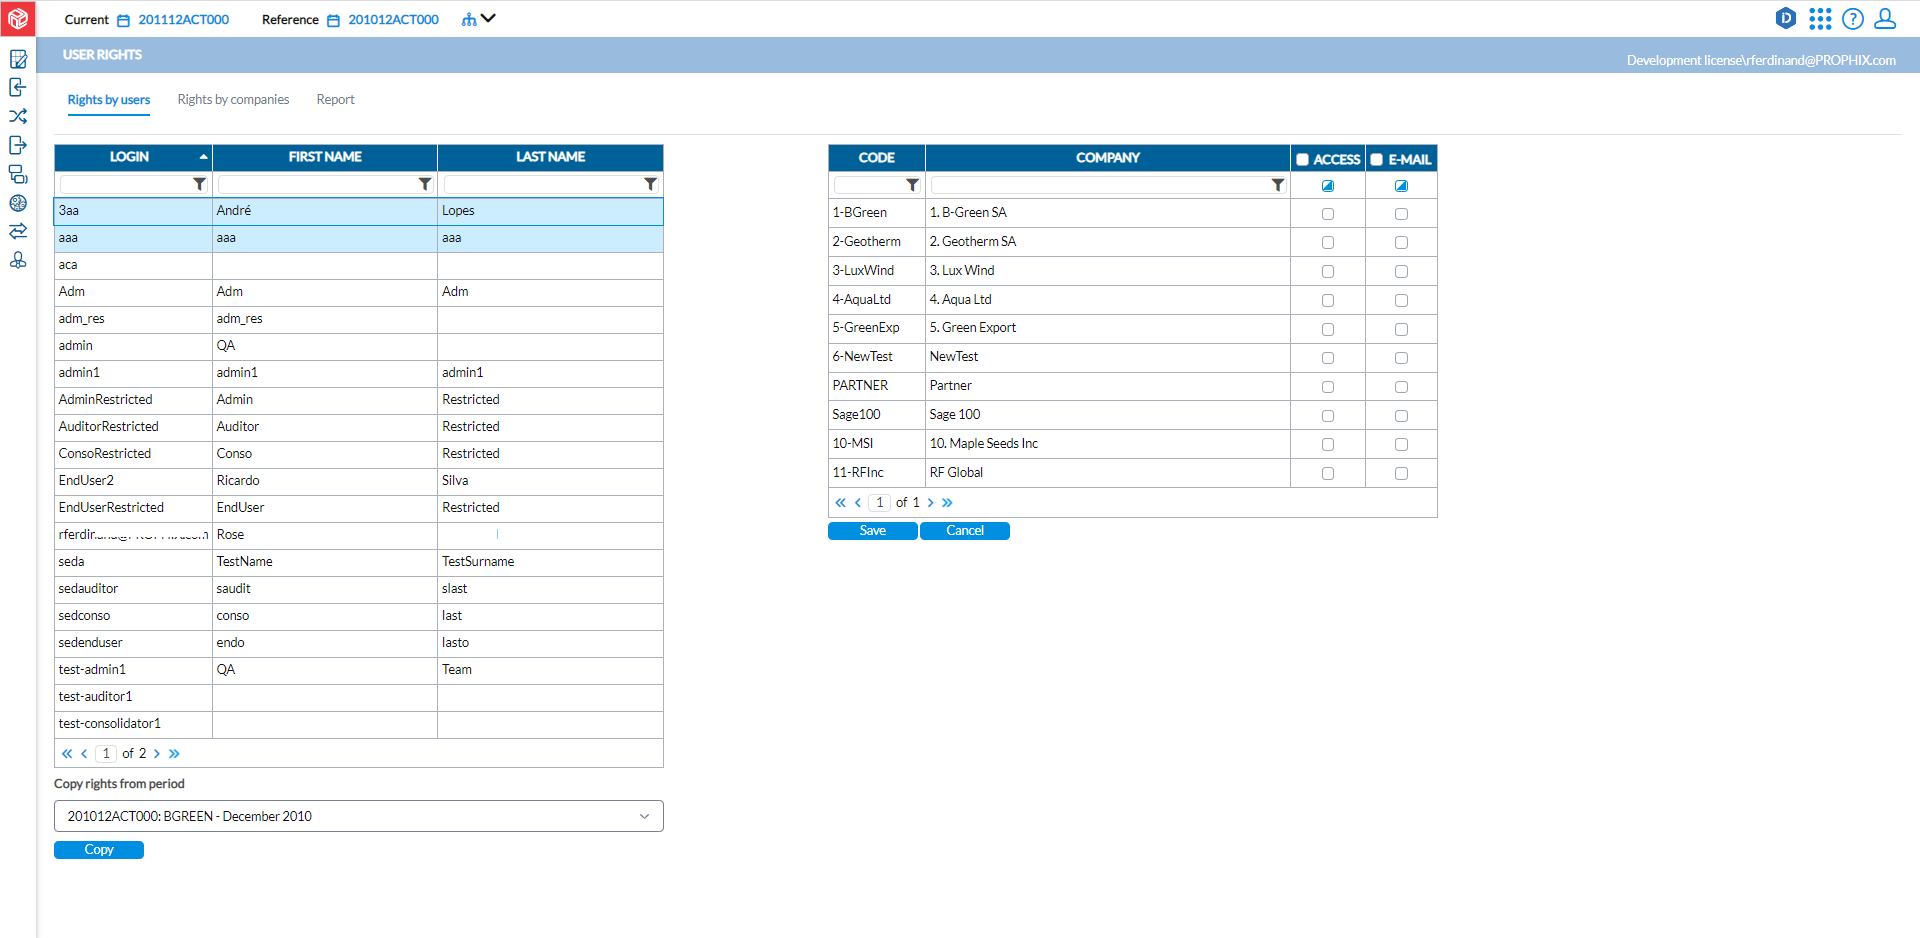
The left-side panel contains a list of existing users. The right-side panel display the existing companies. When you click on a user on the left-side, you will see the user rights (if any) to companies on the right.
To add new rights for a user, you have the options to copy rights from a period or add new rights for the current period.
Copy user rights from a previous period
To give a user the same rights they had in the previous period:
-
From the left-side panel, select the user to whom you want to assign rights.
-
Go to the Copy rights from period drop-down list and select the period from which you want to copy the user’s rights.
-
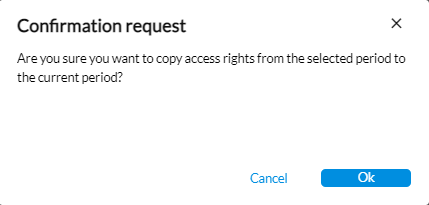
Click
 . The following dialog is displayed:
-
Click
 to proceed. To cancel, click Cancel.
Add new rights for a user
To add new rights for a user:
-
From the list of users (left-side panel), select the users login.
-
On the Companies (right-side pane), look for the company or companies to which you want to grant the user permission and select the Access option.
-
To specify a user as a recipient of messages /comments sent to users in the selected companies, select the Email option. The user’s email address must be correctly define in the user profile.
-
Click
 .
.
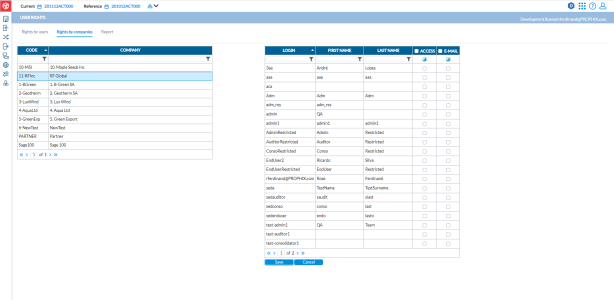
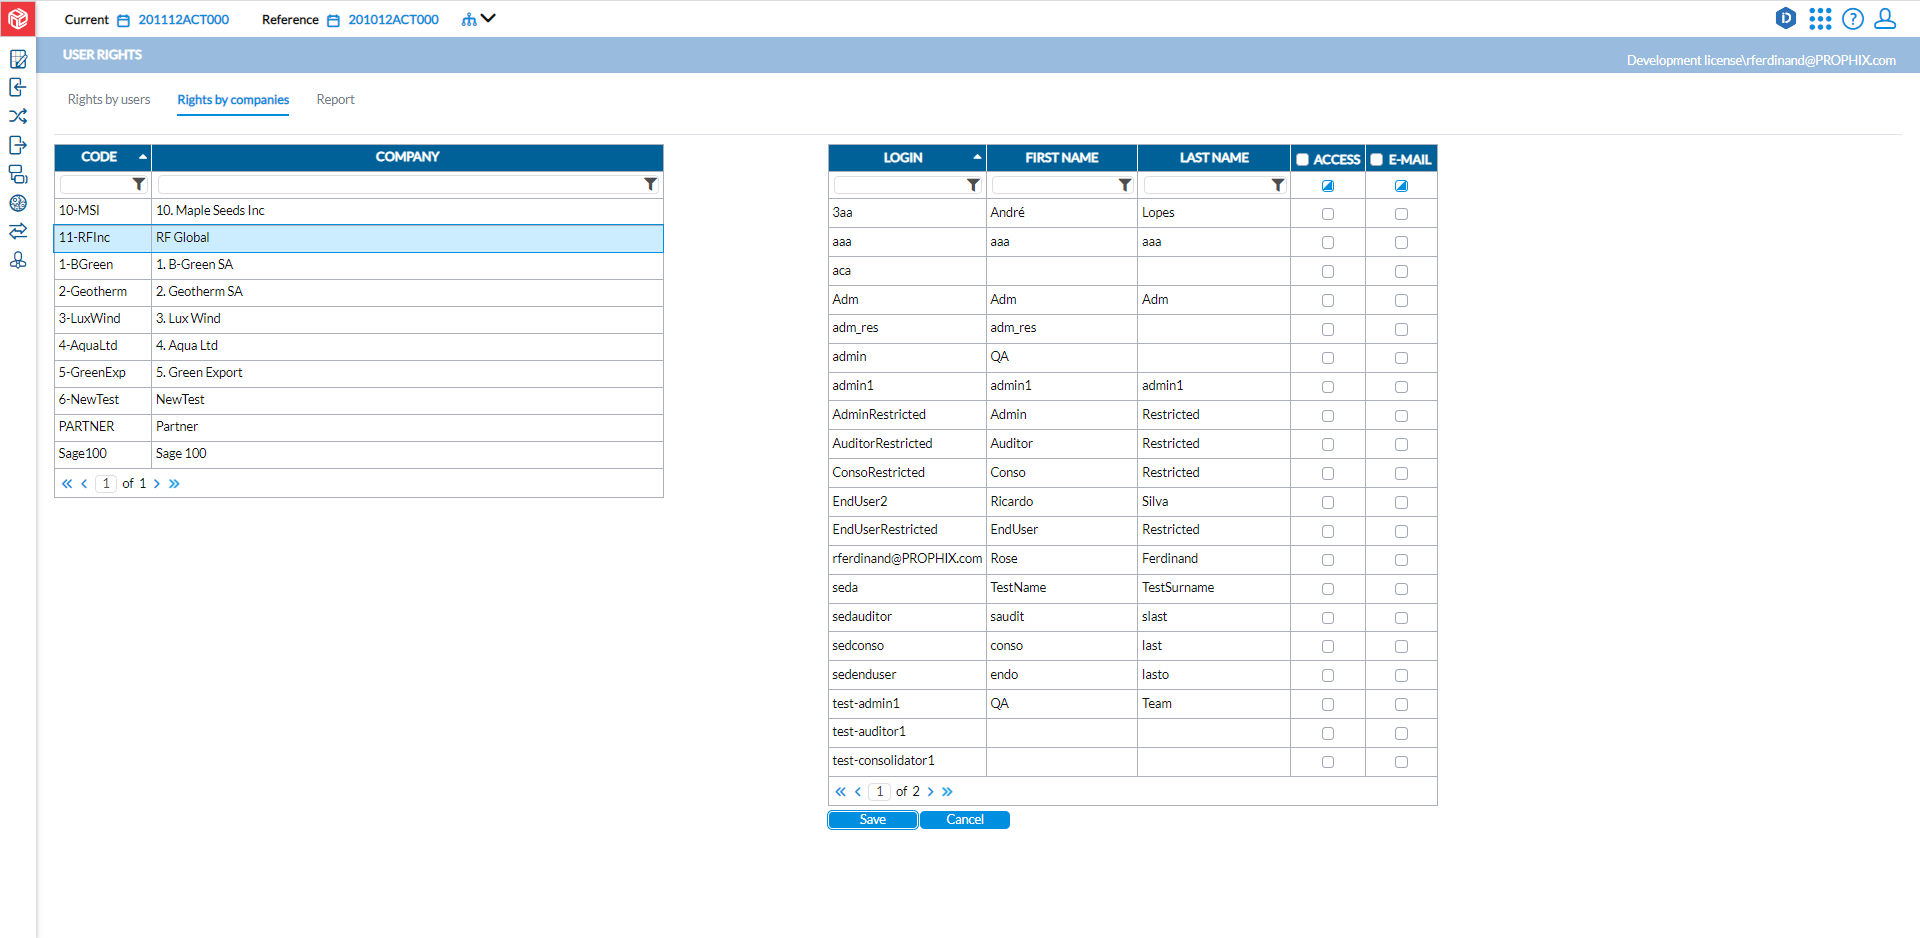
Grant rights by companies
Using Right by companies tab, the admin is able to see at a glance the users (up to 20 per page) who have access rights to a selected company. The admin can add/ update user rights as required. This tab provides another way to link each company to the right user.
-
Click the Rights by companies tab.
-
From the list of companies (left-side panel), select a company to view users and their rights.
-
You have these options:
-
To add access or email rights to a user, look for that user and select the Access or Email options
-
To remove permission that was previously granted, clear the relevant option.
-
-
Click
.
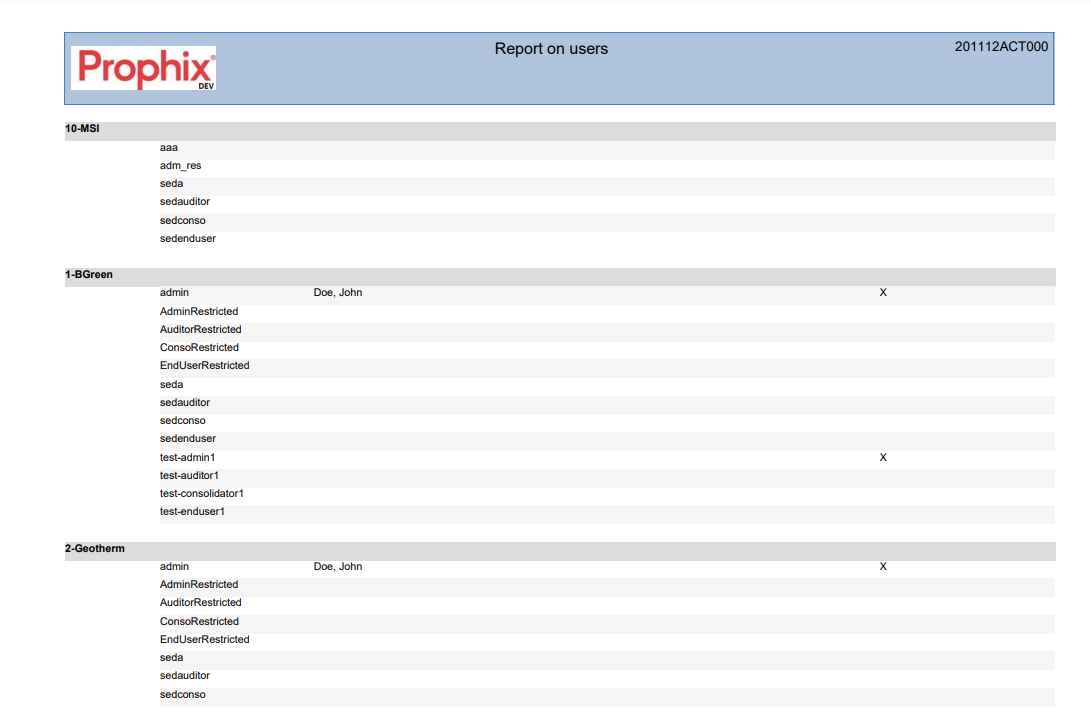
Generate user access report
The User Access Report shows the users (login IDs) or company codes and their access to different companies.
To generate a user access report:
-
Click the Report tab.
-
From the Order by drop-down list, select an option to specify how the report will be organized (by Login, Company code).
-
In the Export format field, choose the output file type you want. Options include PDF, XLS, XLSX, and CSV.
-
Click
 to generate the report. After the report is generated, a download link appears below for you to click and view the report in the file format you selected.
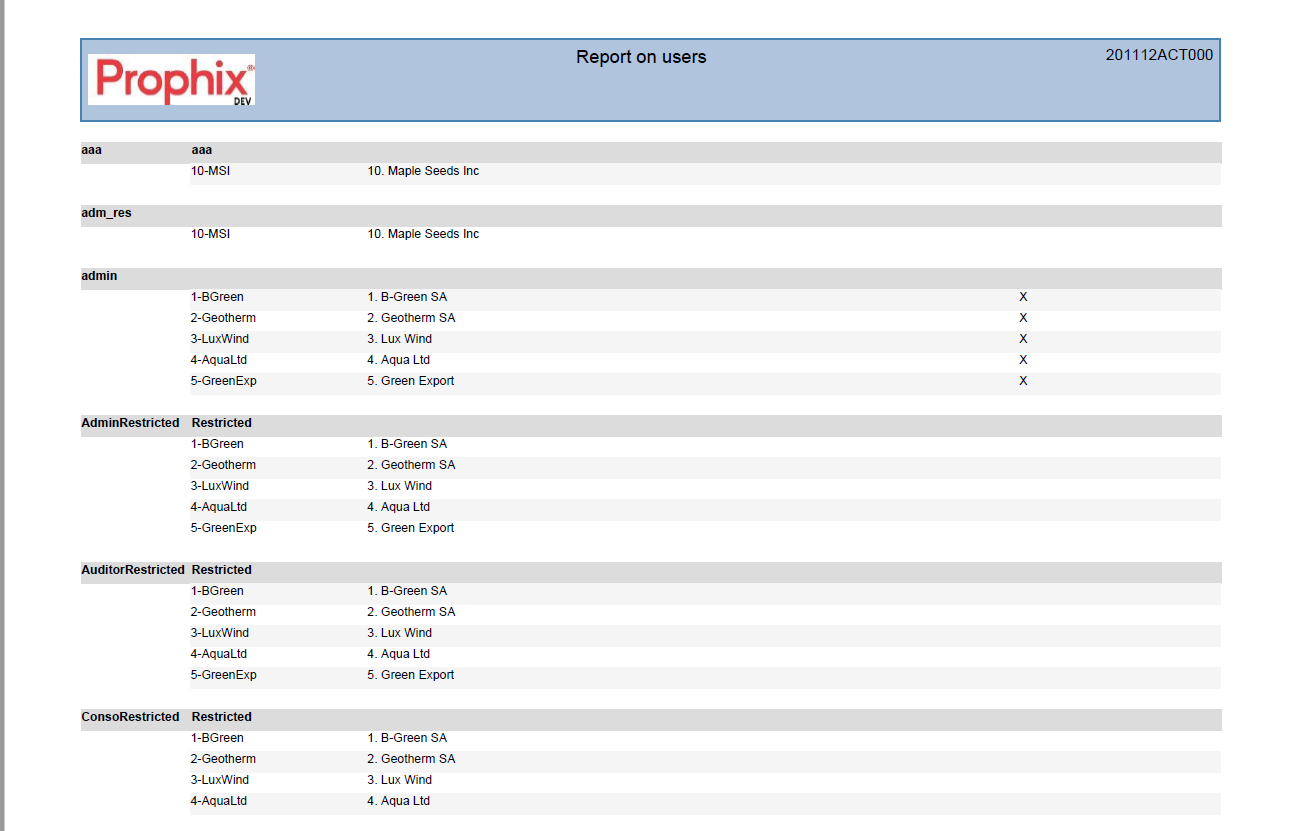
Sample reports
User access report ordered by Company code:
User access report by Login: