Enter intercompany transactions
The Intercompany Data Entry page allows you to enter intercompany transactions. These transactions can be recorded by specifying the relevant Account number based on the group Chart of Accounts and identifying the involved Partner.
Note: Although you have the ability to manually enter your invoices on this page, best practice is to use the import function to upload transactions.
To access the Intercompany Data Entry page, click ![]() Data Entry > Intercompany Data Entry.
Data Entry > Intercompany Data Entry.

There are four tabs on this page and they are used as follows:
-
Content - this is where you enter Company/ Account / Partner information.
-
Amounts by partner - this is where the Closing amount by partner is displayed.
-
Amounts by account - this is where the Closing amount by account is displayed.
-
Report - this is where you can get the report on amounts report in PDF or Excel format.
Enter a new transaction
When entering a new transaction, you need to fill in the Company, Account, and Partner information.
-
In the Company field, enter the code of the company recording the transaction. The company name and local currency are displayed.
-
In the Account field, enter the account code associated with the transaction. For example, for purchases, enter 600000
In the Partner field enter company code of the intercompany partner.
Note: You can use wildcards to search in the three fields above.
-
Click
 to display, if any, all existing invoices for the intercompany Account and Partner. Details of the invoices are displayed in these columns:
-
Account - account code for the transaction
-
Partner - intercompany partner
-
Rule - intercompany rule associated with the account
-
Document Reference - invoice number
-
Document Date - date on invoice
-
Document Amount - total amount on the document
-
Account Amount - amount in local currency
-
Transaction Amount - amount in the currency of the invoice
-
-
Click
 (you may have to scroll to the bottom to see this icon).
 -
In the new row, enter the Document Ref (invoice number), Document Date, Account current amount and Transaction Amount, and Currency.
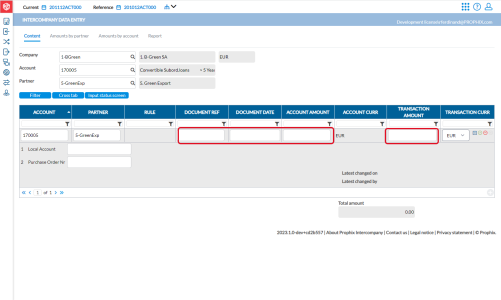
Note: The application uses Document Ref (invoice number), Document Date, Account current amount and Transaction Amount, and Currency in automatic markings and they must be provided. The application uses these four details to check the transaction with both partner companies and when they match, marks the transaction as OK.
-
Optionally, add additional information about the transaction in the Local Account and Purchase Order Nr fields. For example, if the partner company is using a different chart of accounts, you can put the partner’s local account number in the Local Account field for information purposes. Adding this additional information can help you distinguish transactions and make markings easier.
-
Click
 to save the new transaction.
Modify transaction details
Use the following steps to modify an existing transaction:
-
In the Company field, enter the code of the company that recorded the transaction. The company name and local currency are displayed.
-
In the Accountfield, enter the account code associated with the transaction. For example, for purchases, enter 600000.
-
In the Partner field enter company code of the intercompany partner.
-
Click
to display all the existing invoices for the intercompany Account and Partner. -
In the Document Reference field, type the reference number of the invoice you want to modify and click Enter.

-
Click on the transaction row to display the details.
-
Modify the transaction as needed.
-
Click
to save the modified transaction.
Delete a transaction
-
Follow steps 1- 5 of Modify transaction details.
-
Select the transaction and then, click
 to remove it.
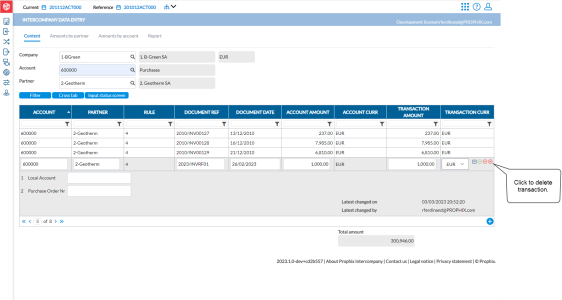
-
Click
 to confirm removal of the transaction.
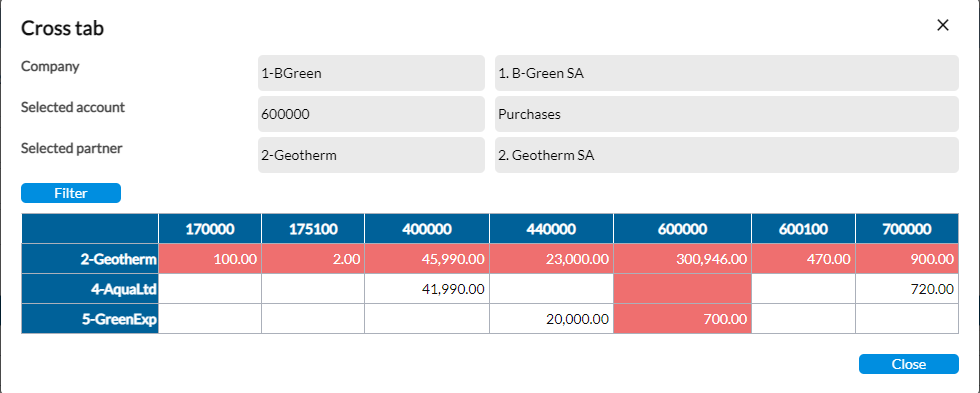
Display cross tab view
The cross tab shows the relationship between a selected company, and its partners and their totals by account.
Click  to display a cross tab view of all the company’s partners and their total by account. You can use this to compare the types and values of the transactions that the company is doing with other intercompany partners.
Change data input status
From this page you can go to the Input Status page and modify the data entry status on the company.
If, after completing data entry you want to indicate your progress, click  to go the Input Status page and apply the applicable status.
View amounts by partner
In the Amount by partner tab, you can view how much transactions a company does with its intercompany partners on a particular account. This is just for informational purposes only.
-
Click the Amounts by partner tab.
-
In the Company field, enter the company name.
-
In the Account field, enter the code of the account you want to display by partners. For example, to view Purchases, enter account code 600000.
-
Click
. All the partners with which the company has done transactions with the account code you entered are displayed in the grid below. The Total amount of all the transactions is displayed, and for each company, the amount of transactions contributing to the Total amount is displayed under Account Amount.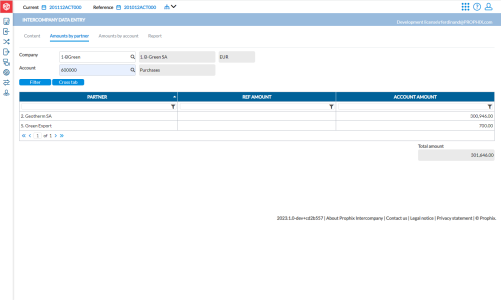

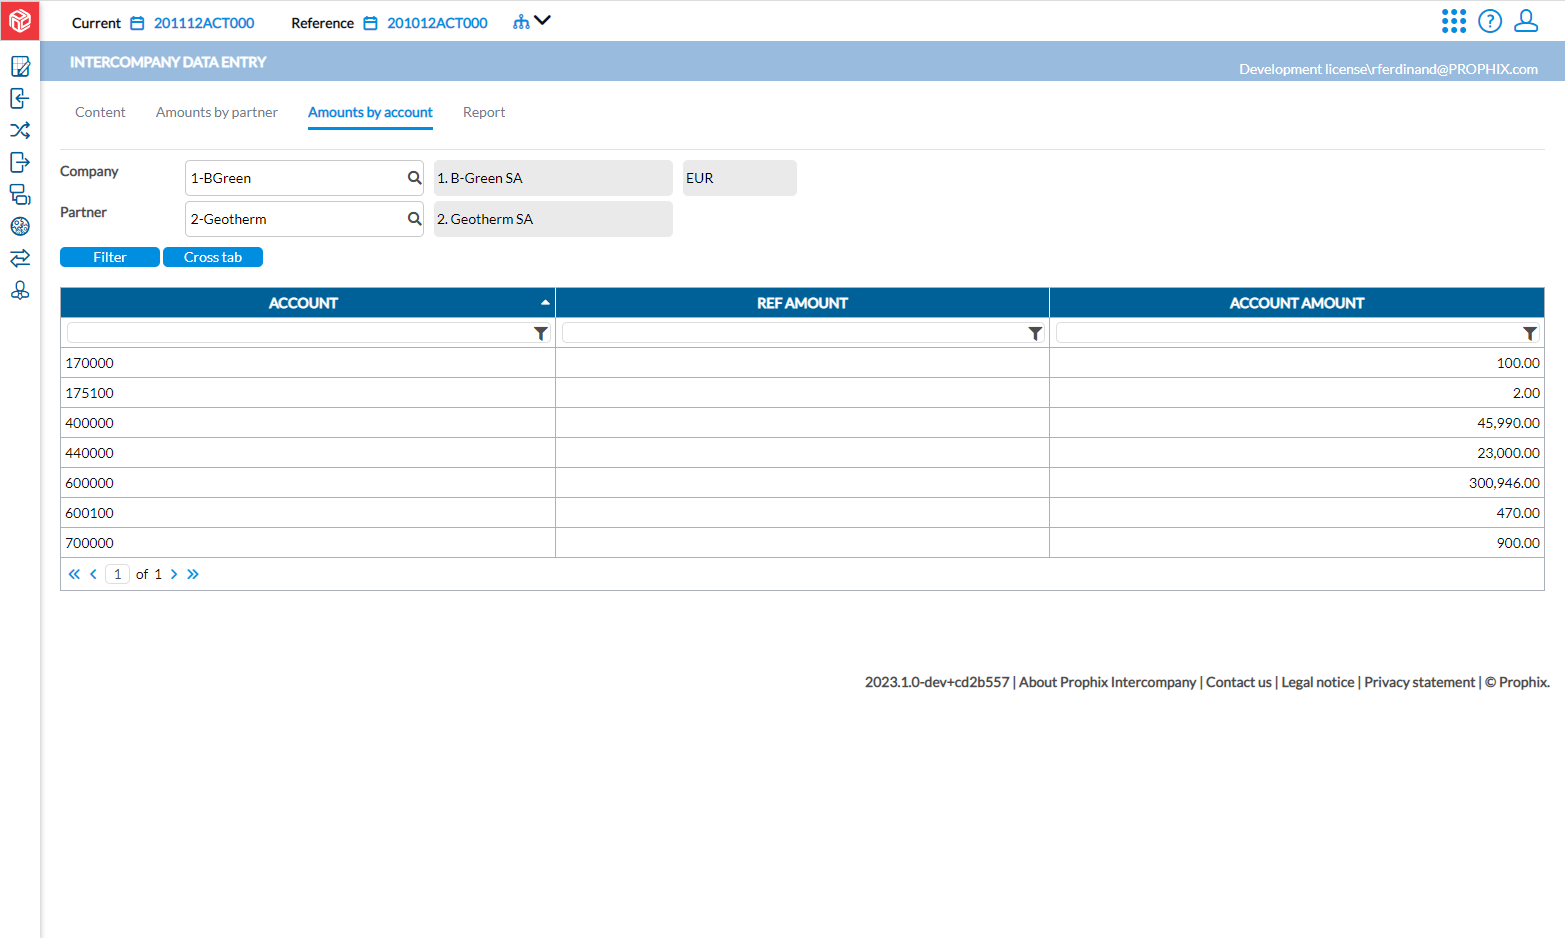
View amounts by account
In the Amount by account tab, you can view the amount of transactions a company does with one partner on different accounts. This is just for informational purposes only.
-
Click the Amounts by account tab.
-
In the Company field, enter the company name.
-
In the Partner field, enter the name of the partner whose accounts you want to display.
-
Click
. All the different intercompany accounts with which both companies have done transactions are displayed along with their different totals.
Generate a report of amounts
Through the Report tab you can get intercompany accounts reports at invoice level.
-
Click the Report tab.
Note: If you already filtered by Company, Account and Partner codes, these fields will show the values you selected. If you don’t want to use filter on Account and Partner, leave both fields blank to include all the transactions of the chosen company.
-
Enter all the parameters you want on your report in their respective fields.
-
In the Export format field, choose the output file type you want. Options include PDF, XLS, XLSX, and CSV .
-
Optionally, to include the additional information you provided when you entered the transactions, select Additional Information.
-
Click
 to generate the report. After the report is generated, a download link appears below for you to click and view the report in the file format you selected.