Export data file structures
On the Export Data File Structures page, you have the ability to define the specific structures of your export file. This enables you to extract various data, including account information, company details, flow data, and dimension data from Intercompany Management, and export it to an external file.
To access the Export Data File Structures page, click ![]() Export of Data > Export Data File Structures.
Export of Data > Export Data File Structures.
Create an export data file structure
-
Click
 .
. -
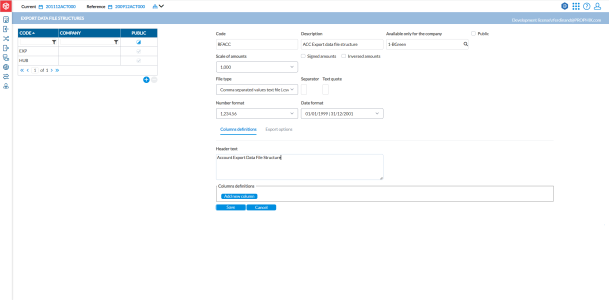
Enter a Code and Description for the file structure in their respective fields.
-
Do one of the following:
-
To use this file structure for a specific company only, in the Company field, enter the company code.
-
To make the file structure available for other companies, click Public.
-
-
In the Scale of Amounts field, specify the scale of value to use in the file (e.g. x1=units, x1000=thousands, etc).
-
In the Signed Amounts field, if the amounts are signed (+ for the Debtor amounts, – for the Credit amounts), select this option.
-
In the File type field, select a file type. Different formats require different parameters:
-
If you selected .CSV, enter a Separator (comma, tab, semi-colon, or space), Text quote (single quote or double quote), Number format and Data format.
-
If you selected .XLS , enter the Sheet name. Data will be exported to the specified sheet.
-
If you selected . XLSX, enter a Sheet name. Data will be exported to the specified sheet.
Note: If you select XLSX and you want to use a template, select Use a template and then, select a template from the drop-down list. When you select a template for the export, the system automatically recognizes that you are generating a report (not an ordinary export) and uses the model in the template to generate the report. After creating and saving the file structure, go to the
 Exports of Data > Analysis Report page to select and generate the report. See Analysis reports.
 -
If you selected HUB, enter a Package Id. If you want to make the file available for OData, select Available for ODATA.
-
-
In Column definitions tab, do the following:
-
In the Header text box, enter a header for the file structure.
-
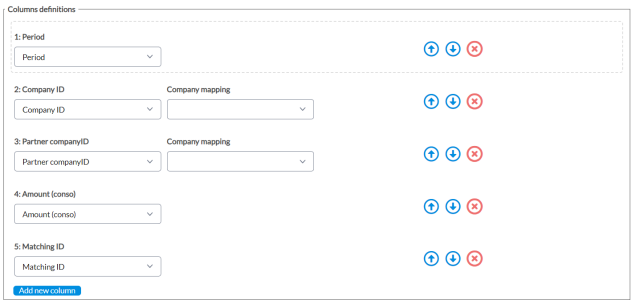
In the Column definitions panel, click
 and configure the source column names to the target columns.
-
You can arrange the columns by using the
 and
and  buttons to move them.
 -
To delete a column, click
 .
. Note: Whenever a transaction is tagged, a transaction identifier is automatically assigned to the tag. To export these identifiers, add the Matching ID column to populate the assigned identifiers in the export file in the column.
-
-
-
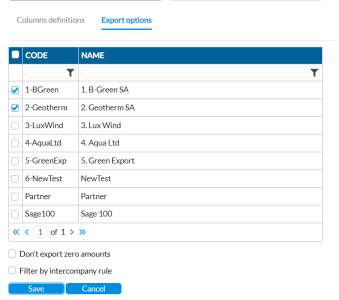
Click the Export options tab and from the table of companies, select the company or companies.
-
Optionally, to exclude zero amounts from the export, select Don't export zero amounts.
-
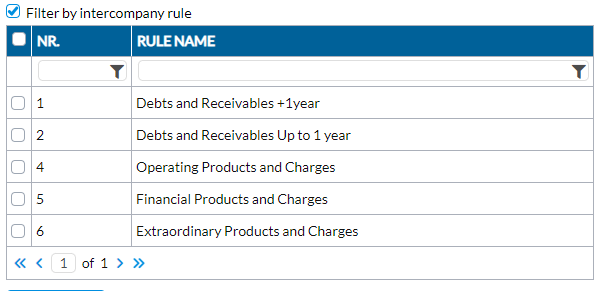
Optionally, to filter the data by intercompany rule, select Filter by intercompany rule. In the table displayed, select the rules by which you want the data filtered.

-
Click
 . The new file structure is listed on the left-side panel.


